Welcome to the Burnout Diaries, where I spend some time investigating the reasons behind my eight year burnout and try to fight my way back out.
The secret to curing most things is a proper diagnosis. I spent a lot of time over the years trying to figure out just what was holding me back from creating. There are many reasons that stopped me in the first place but there’s one that kept me from coming back. I fell out of practice.
Stylus Woes
Last week I installed a mount for my monitors to improve my drawing setup. I’m happy to report that it works great! I’m less happy to report that my hand isn’t cooperating.
This is something I’d seen coming. I’d kept it at bay with often belligerent optimism, but the truth of the matter is that after six years away from digital drawing has made the first days back hilariously tough. The biggest issue is the screen. I stare at screens all day, but the luminosity of my tablet means I’ll probably need to invest in blue-light glasses. My eyes were spinning after just a few minutes fiddling around. Secondly is positioning. Most of my life i’ve drawn on a flat surface, ergonomics be damned. The only exception being when I paint or do life drawing. Unlike painting, digital drawing requires a short grip on the stylus, so the hand angle feels particularly uncomfortable.
There’s nothing to be done about it except practice.
Stylization Woes
I did manage to get a little bit drawn digitally this week. I didn’t like the results nor did I expect to. the most important part of these exercises was seeing where I was. The frustrations that lead to my burnout have somewhat cooled and I’m better able to determine what was ticking me off. It’s stylization!
Mostly, I don’t stylize enough. It takes a lot of effort and provides a mediocre result that’s too close to realism, but not close enough to be realistic. In short, I hate how lackluster it is.
The source of this particular issue probably comes from my desire to be able to draw different faces in my style. It’s actually important to certain plot points in ID that certain people look noticeably alike versus the general populace. There’s only so much you can do with weight and height if everyone has the same doll face.
Unfortunately attempting that in my style means I leaned too much towards detail and not enough towards shape. I’m sure if I continue to work at it I’ll find a happy medium, but I can confirm that it’s not a fun thing to continually miss the mark while trying.
Saddle Sore
Getting back in the saddle when you’re older is always harder. It was harder to learn to run after breaking my leg as an adult than it was to learn as a gummy-boned baby. It was harder to learn how to use my ergonomic mouse after years of using flat handed ones. Everything is harder when you’re aware of how it’s supposed to go.
Probably because of all the time wasted remembering how easy it once used to be. It’s far quicker to lose muscle memory than to forget it, and I think the same is true of my art block.
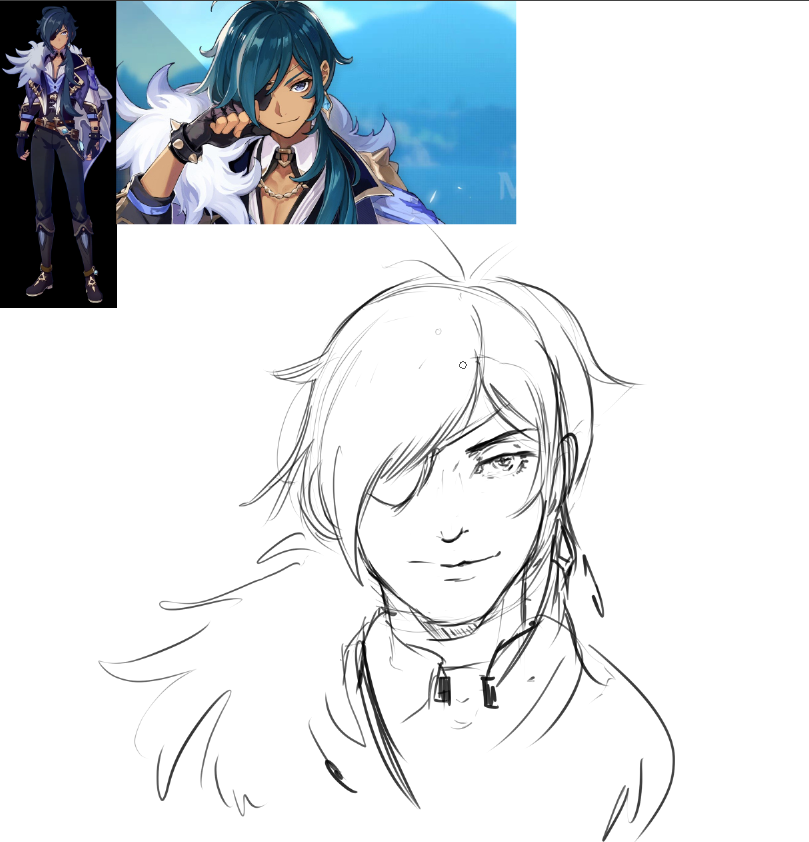
I find it significantly easier to putz around with making thumbnails or color studies in my sketchbook than I do in creating a focused drawing. These are the sort of things that I did during the several years of my worst art blocks – and even then only rarely. However if I were to sit down and think: “I want to draw this character”- I’m in for an hour of frustration before giving up.
I’m exceedingly happy with the quickly rendered thumbs for future paintings, but quit this Kaeya drawing out of frustration within an hour.
So how does one solve this? How do you reach a point where you no longer reminisce as you attempt to work? That’s a question I’ve yet to figure out, whether for running or for art. If I do figure it out, y’all will be the first to know.
fatcr0w is a hobbyist artist with a passion for comics and illustration. They take on too many projects and don’t know when to shut up. It is with great optimism that they believe one day this blurb will be more interesting.
Here lies the culmination of my DIY delerium: my own fonts! I’ve intended to make my own font since my first doomed attempt at creating ID.
I have been called independent by everyone who knows me. Sometimes it’s to the point of insult. While I don’t think all the blame lays solely on me (Ne-Yo was integral to my childhood), I can admit my DIY spirit does-occasionally- get a little out of hand. This week falls under that, but to be fair each of these projects has been a long time coming.
That’s because my second undeniable character trait is procrastination.
Monitor Mounting
When I upgraded my computer back in 2020, I also upgraded my monitor. my current one was perfectly fine, so I still use it, it was just downgraded to the side. After that, I decided to invest in a display tablet in the hopes it would get me to make art again (this did not work).
To make matters worse, my poor IKEA tabletops are not exactly rated for the weight I put on them. I absolutely couldn’t fit my tablet on the same table as the main screen and had to work on a constant swivel if I wanted to see my references while drawing. Having three monitors on concurrently was never the plan, as the secondary monitor is used for discord while I’m full screen gaming. But I didn’t want to have to go to the trouble of redoing my entire setup when I wanted to switch from gaming to art.
Enter the monitor and computer mount (not shown). A solid two hours of careful measuring and fretting over trying to find the stud in my horrifically textured walls yielded some pretty great results. For one, the weight on my poor IKEA table is reduced significantly. I can also now adjust my main screen to my actual eye height, which most stationary desk stands don’t do. The screen already feels brighter and more clear just by being in front of my eyes and not below my nose.
I couldn’t wait to try out the setup.
The biggest win is that now I can simply press a switch to change secondary monitors, and reference without having to spin around. This is especially important for streaming as well.
It took me two years and my total costs came to around $100, but I really should have done this sooner.
Project Planning
I don’t think this counts as DIY, but it did scratch the same itch. I’ve been using Notion for years to innocuously gather links to clothes I want and maps of places I want to run locally. Not exactly the best use of a project-planning software, but I hadn’t reached the point of necessity…Until this week.
As I mentioned in my previous post, I intend to start streaming on Twitch in late October/early November. I also can’t settle down and use a pre-made overlay set. My aggressively independent nature says that I must make all the assets myself.
I haven’t set myself up for too much work (this is an example of hubris), but it’s enough that I have to keep on top of things, or I’ll forget something important and be really inconvenienced when Halloween rolls around.
Notion has a lovely lightweight Gantt chart engine that can be made from a simple database. It’s a great way to see how my week should be going.
The status view is a little cluttered but quite helpful
For now I only plan to use this for Twitch workflows until I get my comic and illustration workflows standardized, but it’s been quite soothing to see everything laid out so clearly.
Feeling Fontastic
Did you notice the one completed task on the timeline above? That’s right. Here lies the culmination of my DIY delerium: my own fonts!
Making these is somewhat addictive.
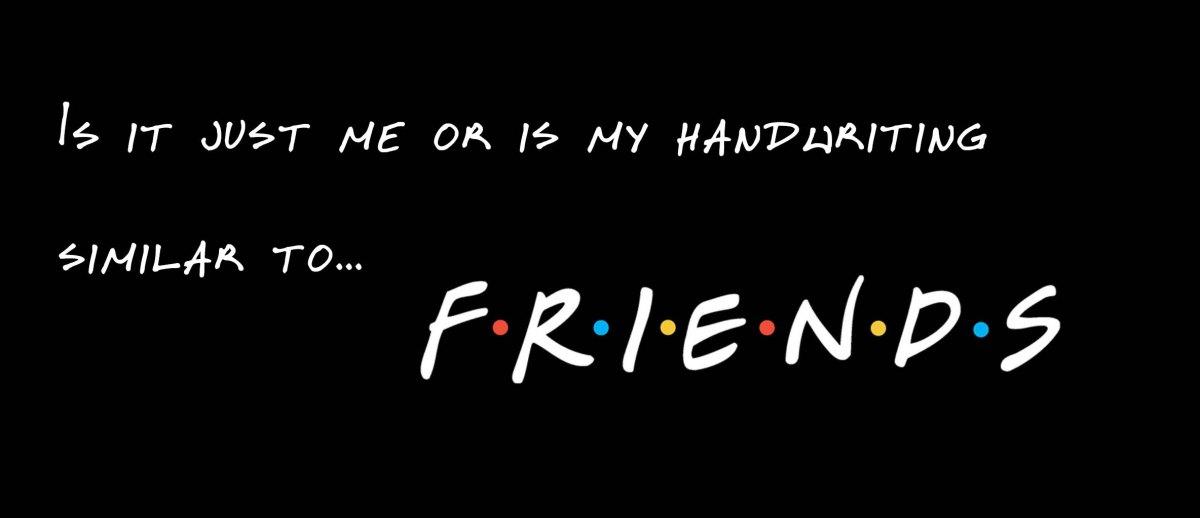
I’ve intended to make my own font since my first doomed attempt at creating ID. I was happy with the pages all the way until I began lettering digitally.
It’s legible but it isn’t right.
There were other things that I disliked as well about the digital process, but this was one of the biggest. At the same time, hand-lettering is an art all its own. Doing it by hand adds another hour per page at least. It’s not an efficient use of time, especially in a comic as detail and asset heavy as ID. I don’t feel guilty about streamlining it either. Pro comic artists who still work traditionally-both eastern and western style with their own unique professional workflows- rarely handle lettering by hand on their own.
I’ve got a lot of ideas and uses for my various handwritings, so there will likely be more cr0wfonts in the near future. For now I’m limiting myself to these four. These are made using the free version of Calligraphr, which limits the fonts made to just 75 characters. This is fine for my immediate needs, but it doesn’t cover all punctuation. I’m currently debating whether I will shell out for a month and make a huge selection, or if I’ll buckle up and use Inkscape to create my own from scratch.
These serve my immediate needs well, and now that they’re out of the way I can concentrate on other parts of this really fun Twitch prep project. I must advise anyone looking to create a font on their own to proceed with caution however. Too much knowledge can be…uncomfortable
Not similar enough to get sued but…
fatcr0w is a hobbyist artist with a passion for comics and illustration. They take on too many projects and don’t know when to shut up. It is with great optimism that they believe one day this blurb will be more interesting.
Figuring out a creative system that suits you is a lot of figuring out yourself.
Before any rise n’ grinders find this post, even though I do have two jobs right now, this sort of crunch only happens once or twice a year. If you’re expecting a long term solution to time management when you’ve given half of it to the corporate machine, you won’t find it here.
What I do have however, is a way to keep my fleeting creative thoughts organized until I can address them. It’s a two-notebook system that’s similar to the more popular bullet-journaling and commonplacing but with enough changes that I can’t neatly fit into either method.
I refer to the notebooks as Left and Right Brain, which will likely come up several times throughout this blog, especially as I begin to gain speed on projects.
(Photo of both books: It also refers to how I place them when I’m about to start a brain dump)
Notebook Junkie
To understand how this method came to be, you must first understand that I am a certified notebook junkie. I will spend hours in a stationery shop assessing every minor detail of a notebook from the way it’s bound to the exact grey of the lines and tooth of the paper. I’m especially guilty of this when it comes to sketchbooks – but that’s a story for another post.
Many systems work to reduce the number of accessories in use but after decades of the less-is-more path, I found that having multiple notebooks suits me better. I guess that makes me some sort of renounced minimalist.
This is my usual café writing stack. From top: Right Brain, Left Brain, Concept Sketchbook, Tablet (for looking up things), and the project workbook for ID.
This process took decades to determine. As a child I wrote stories in cheap spiral notebooks, one for each. They were cheaper than candy and available at all of the same places. This is perhaps where my multi-note habit started.
In middle and high school the now-ubiquitous Moleskine was just starting to stock on American shelves. They were fancy and expensive but the pocket-size version really appealed to me as someone who’s parents read their diary on a few occasions.
Ever since, it’s become a habit to have a Moleskine with me wherever I go, and only a Moleskine. Whether journal, planner or sketchbook, I always had one in my bookbag or purse for twenty years.
A one-journal system was perfectly reasonable during school. Books and homework were heavy, and massive Texas schools meant hauling across large swathes of land at a fast clip. Four extra notebooks just-in-case I had a good idea didn’t make sense.
Now I work from home and have for years. Specifically, I work in a sector that was remote before it was cool and will remain remote for…ever? So without the practical need for minimalism I started testing.
The Right-Left Brain System
This system did not sprout fully formed overnight. I did a lot of things that didn’t work. I did a lot of things that seemed like they worked but couldn’t be sustained. I did some things that ended with a frustrated bout of slicing out pages and recycling the whole set.
I say this to say that if you choose to make your own system, don’t get frustrated if the first few tries fail. Figuring out a creative system that suits you is a lot of figuring out yourself.
In the end, I came up with this three-notebook system.
Artist’s rendition
(Right) Braindumping
(Left) Braindeveloping
Project Work
Just like how our left and right brains are cooperative despite the hemispheric separation, my notebooks aren’t separate holy grounds. They’re just in charge of different parts of my process.
Step One: Get It All Out
Once a journal – always a journal. I have been journaling (specifically with this kind of Moleskine) for two-thirds of my life. It’s a habit I’ve had since childhood and will likely have until old age.
It’s also a very fast, low effort habit. I keep my journal within arms reach, even at home. I can uncap a pen and scratch out an idea faster than opening an app to leave a voice note. A quick doodle, a note about inspiration, a name I like, a plot twist can all be put down in a matter of seconds. No analysis, all creativity. That’s why I call this my right-brain.
Even if it’s a busy day at work, there’s enough space between report loads and phone calls to drop in a few notes. If I’m having a dedicated brain-dumping session I can pump out pages and pages of concepts and walkthroughs.
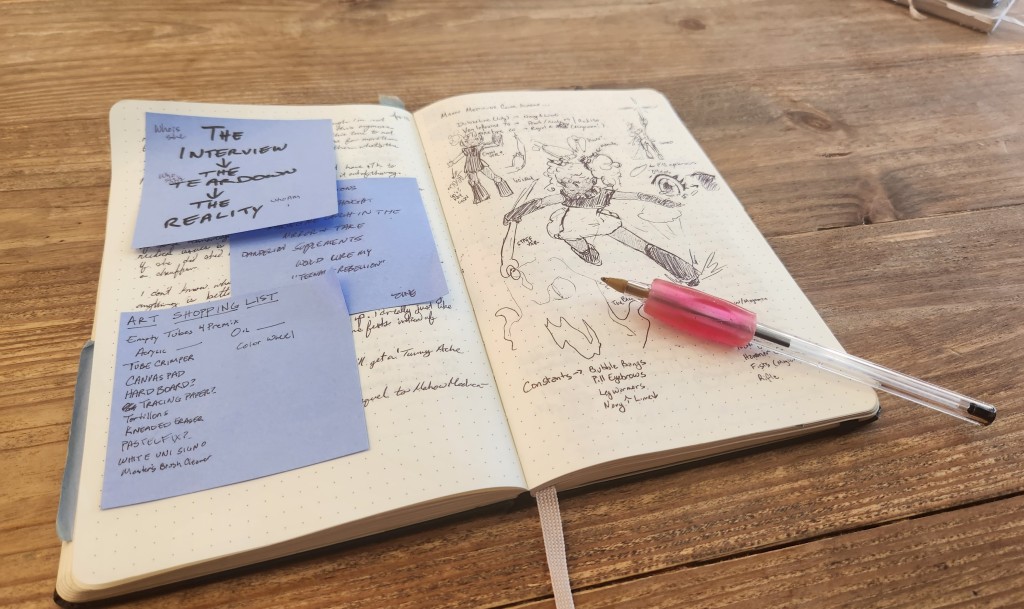
An average page in my journal: Lots of sticky notes, doodles, and of course a full page of daily angst.
But once I get them down and move on to other things, it becomes harder to pick them back up. The are scattered and disorganized across several pages-often months, even years apart. When I am ready to pick up a project, finding all of the bits and pieces and remembering what I meant becomes a hellish task.
Where is the line between shopping lists and project plans? What year did I come up with this idea? What the hell did I mean by “dead butterfly”? I needed a more efficient way of gathering my creative thoughts.
Enter the left-brain notebook.
Step Two: Filter and File
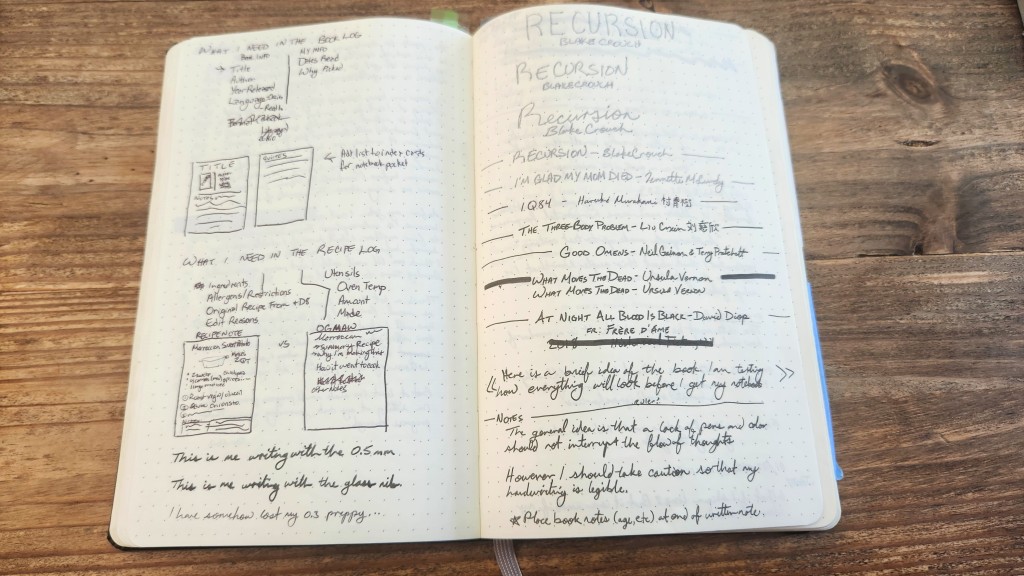
What I now consider my left-brain did not begin as such an all-encompassing project. I learned about commonplace books through curiously clicking a suggested video on YouTube. The original intention was to keep my book notes organized for the book clubs I’m in. Most of the how-to literature on commonplacing has this sort of notetaking in mind.
Early plans for my “Book Log”
As I began using it I found myself falling back on tactics I used in college to keep track of my research. It snowballed very quickly from there to include little bits of project management, key notes to investigate later and so on until it became a catch-all for any idea I want to return to later.
Admittedly, the structure is still under construction. There are still a lot of note types I have not yet encountered, but for now it is a very effective quick reference. It’s especially handy in the calm after the storm of work deadlines.
This week I pulled four all-nighters in a row to get a fix out in time for a meeting -that was cancelled. I’d also spent the weekend before gathering all of my library holds that had suddenly come in, so I was flush with ideas and connections for my various stories- with no time to develop.
Enter the left brain, specifically the parking lot pages. Yes, just like the ones used in corporate meetings. This is where I store the names of books that pop up in reference when researching a topic, scientific concepts I need to explore for Future Recurrence, art safety processes I need to document, restaurants I want to review, and recipes I need to research for Wonder Diner. It’s a to-do list with purpose.
Once the crunch is over I can dedicate time to one of my many projects. I’m not beholden to any particular deadline when I’m developing ideas. I’ll simply pursue the one my heart desires at any given time. This is when the parking lot comes in handy.
All I have to do is pick a topic and continue where I left off. Once I do complete the topic, the lettered pages of the notebook allow me to annotate where I addressed that question. I keep this notebook open when working in one of my project notebooks.
Step Three: Project Notebooks
Not all of my projects are large or complex enough to warrant their own notebook. Those projects are also the ones that don’t really require any research or cross referencing for continuity. For these projects a stream of consciousness filtered into a to-do list is enough.
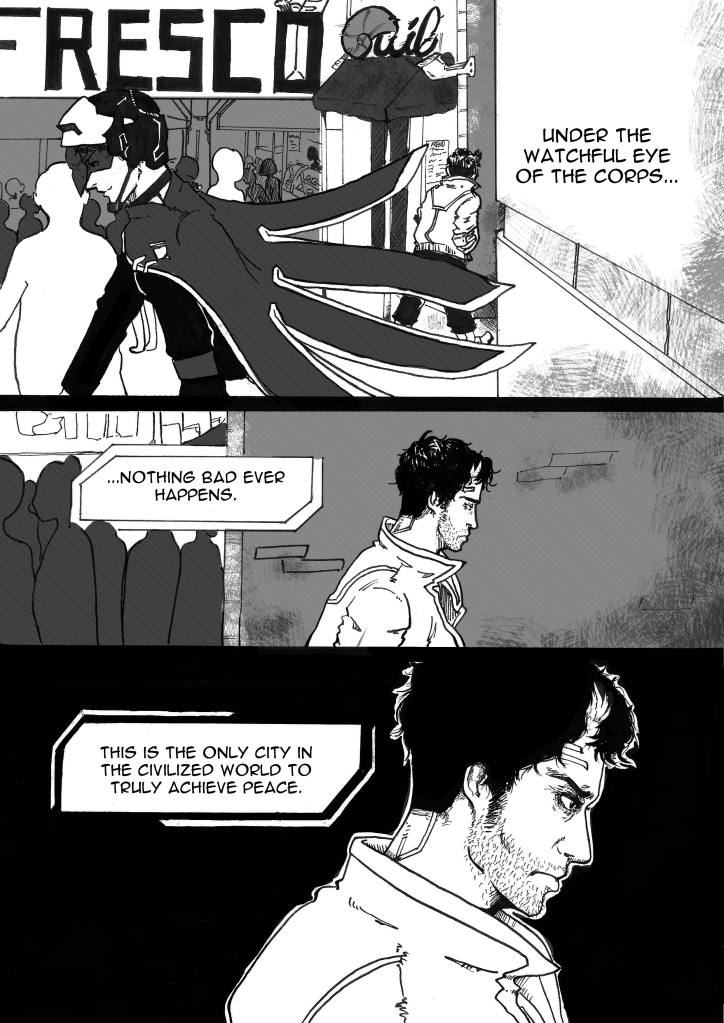
But for my historical and science fiction ideas I keep them in dedicated notebooks. This is an evolution of the spiral notebooks I kept as a child. School paper is not archival and by the time I graduated high school, many of my middle school writings were falling off the spiral. I purchased a perfect-bound dot grid notebook from Michael’s-now discontinued- and used it to keep notes for the comic idea I’ve worked on since high school (I think this counts as a coping mechanism more than a publishing project now, half a lifetime later. )
Project notebooks are where the work actually gets done. This is where I scope out the plot, plan maps and encounters, count out how many character designs I need to make, and doodle scene thumbnails to get the feel right. Of course the paper quality means that I can’t go through the full gamut of development, some things must be done on paper that can handle ink loads. But the vast bulk of actual story crafting happens here.
Future Finetuning
This system is still relatively new, so there’s still a long list of things to try and optimize. Once I have spent more time and filled up a left-brain or two I might make a more in-depth walkthrough so that others can try the system for themselves.
For now however, I’m happy with how easy it has become to pick up where I left off! It feels good to be able to connect my inspirations at the turn of a page without forgetting what I meant.
fatcr0w is a hobbyist artist with a passion for comics and illustration. They take on too many projects and don’t know when to shut up. It is with great optimism that they believe one day this blurb will be more interesting.